Flying with your baby or toddler is probably not an activity you relish, even if you do it all the time. Upping the ante and taking your little one on a plane single-handed? Madness, surely. Well, yes, but sometimes you’ve got no other option.
This week, for example, I’m visiting my brother and his family in Los Angeles. My partner is busy with work, so I had to fly by myself with the baby girl. I flew with her by myself once before, but it was a short flight and she was just six-weeks-old – a far easier proposition than taking a hulking 21-month-old half-way around the world.
I prepared myself for the possibility that she might not sleep at all, be super grumpy and to whinge for the whole flight. I did not prepare myself for the possibility that the flight would be cancelled after boarding, requiring a long slog back home by myself with the girl on the train, then a journey to a different London airport for a flight the following day.
You can only imagine my delight when that is exactly what happened.
Clearly, I would have preferred to avoid the stress and tedium of this situation. Looking on the bright side however (something I was only able to do once I’d got home, put the baby girl to bed, and drunk a cold beer in the garden), the cancelled flight turned out to be pretty useful as a trial run for the one the following day.
Pack light, pack clever
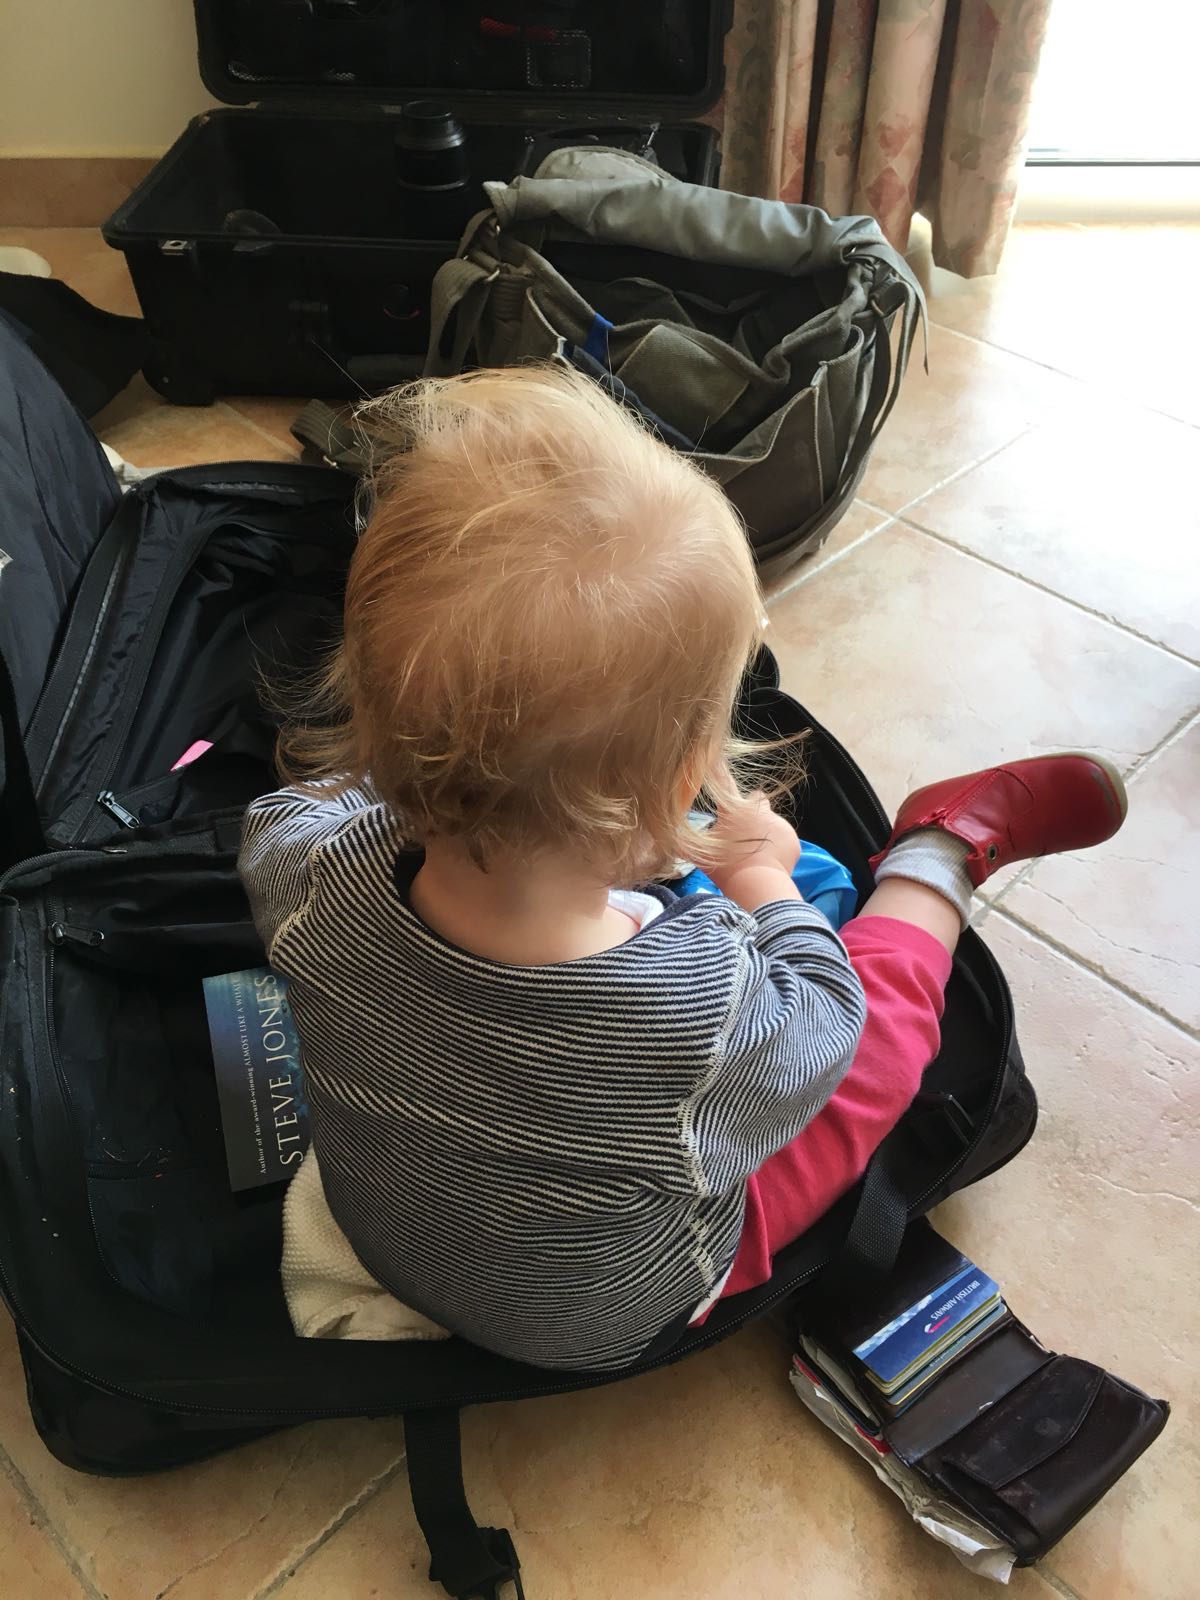
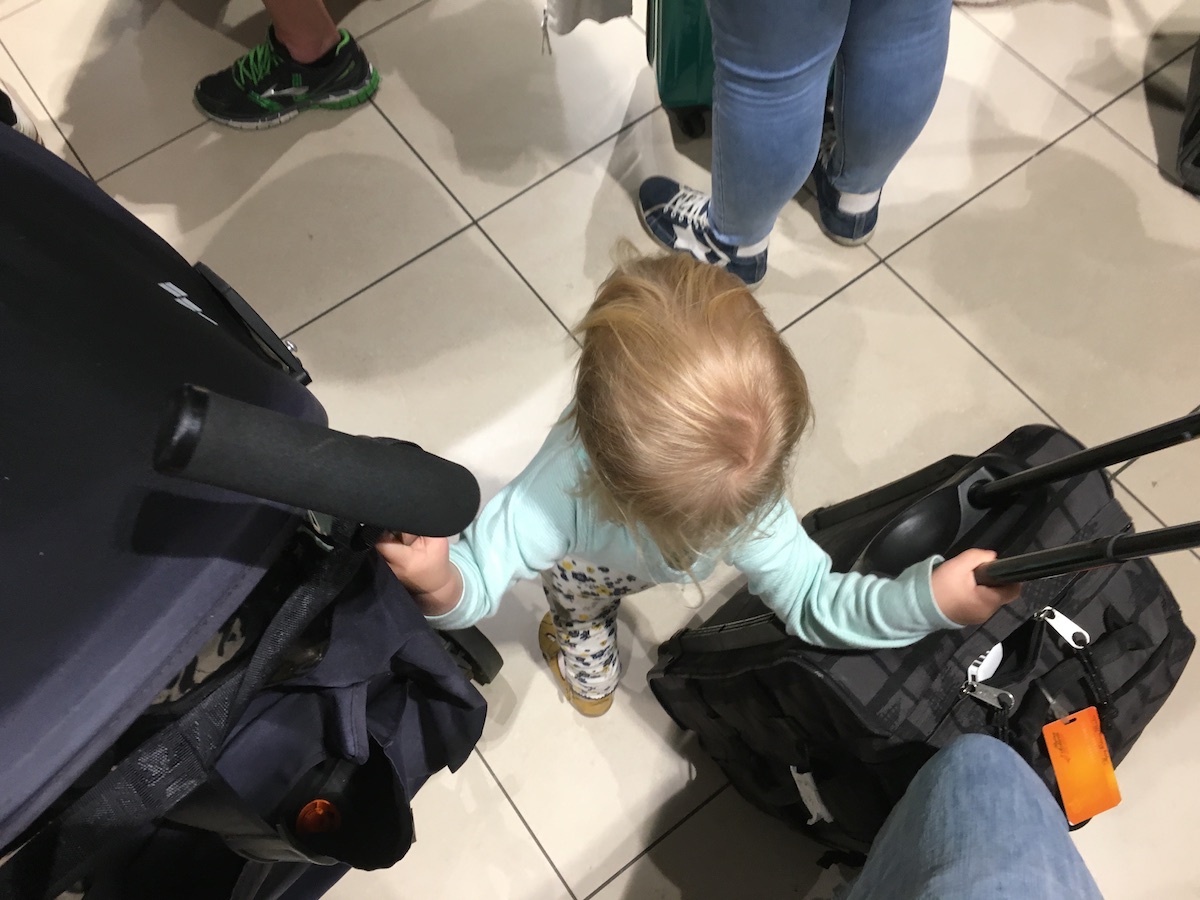
Waiting to board the cancelled flight with the ill-advised wheelie bag
I consider myself a good packer, but I made a bad call when it came to packing for that cancelled flight, opting to bring a wheelie cab bag along with our suitcase, my little handbag backpack and the buggy. I could handle it all myself at the airport, but the moment I had to leave the baggage trolley behind I was seriously overburdened, reliant on the kindness of strangers.
I would have taken a cab home from the airport that afternoon but couldn’t find a taxi company with a car seat available at such short notice, and didn’t want to risk a long drive without one. I could have waited an hour and a half for my partner to come back and pick us up, but the baby girl was already seriously overtired and I wanted to get her home as soon as possible (plus, my partner was busy trying to book us another flight).
In the end it worked out fine: we got the train to London Bridge and my partner picked us up from there, various fellow travellers having gone out of their way to help me juggle the luggage and the girl. We arrived home safely and emotionally unscathed (the one moment where I almost lost it was when I saw the sign at Gatwick Airport Station that says no trolleys allowed past the barriers, and the attendant told me that there was a train in three minutes and then not again for nearly an hour; seeing my despair, he let us through with the trolley, we dashed to the lift, and made it to the platform with 30 seconds to spare), but I made sure I repacked the contents of the wheelie bag and my backpack into one big backpack for the flight the following day.
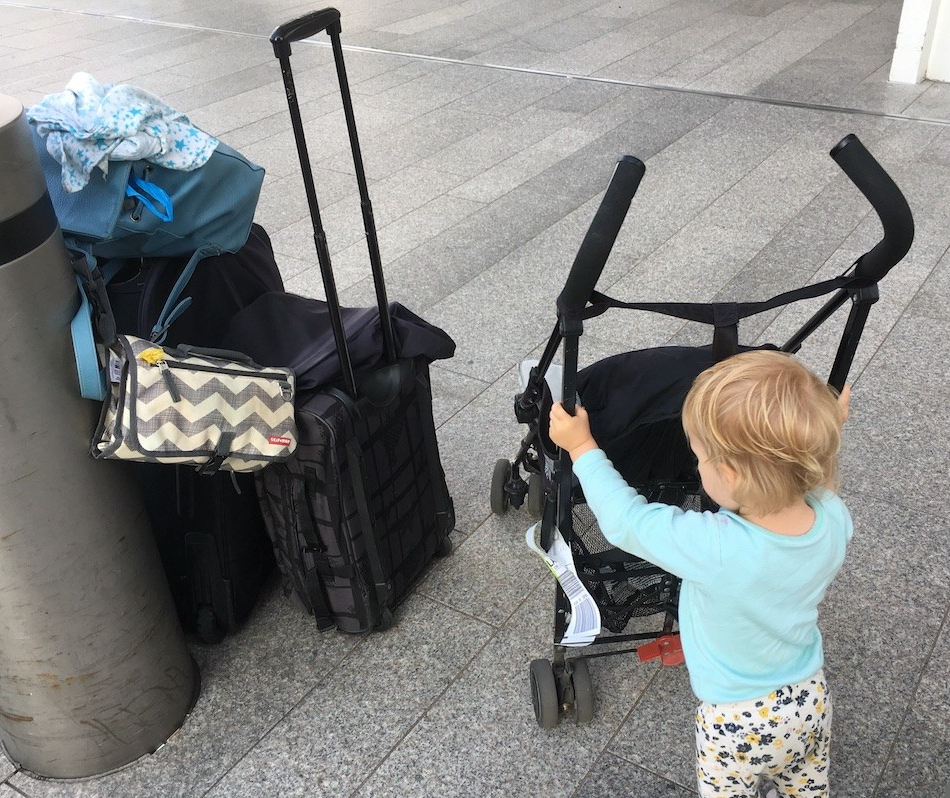
Bags within bags
Too many bags for one woman and a toddler
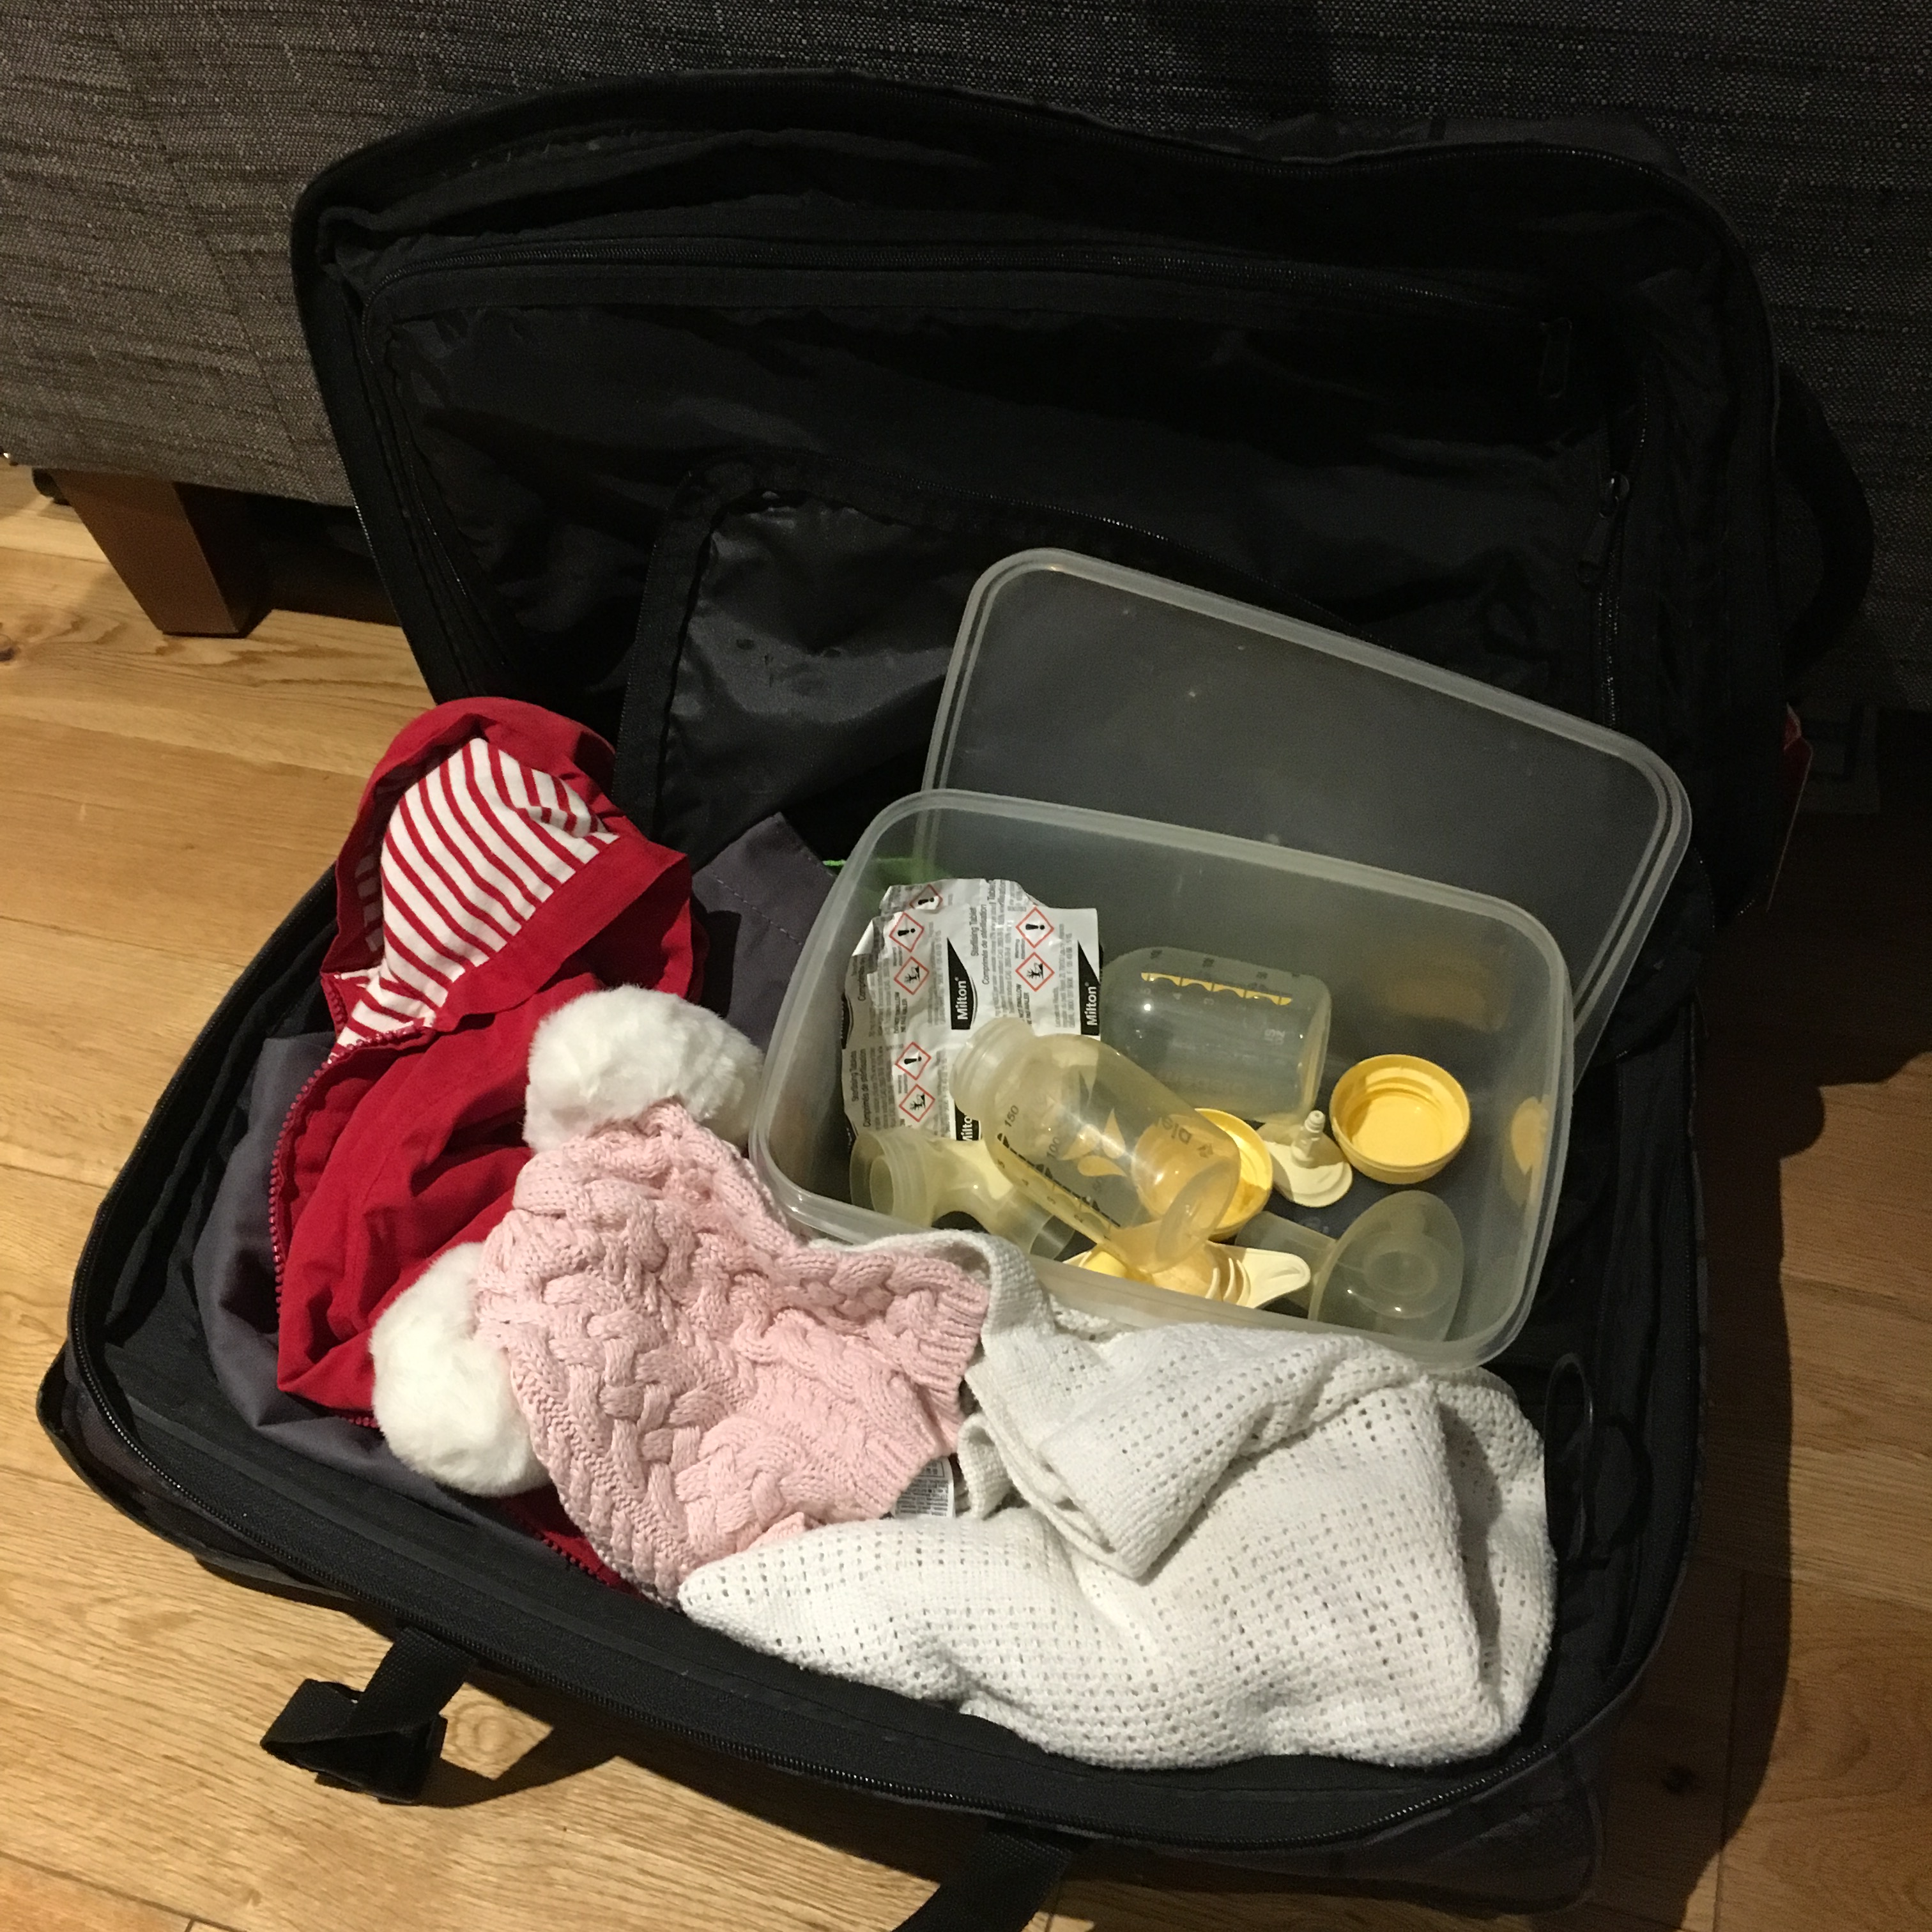
If money were no object I would have booked the baby girl her own seat on the plane. Not fancying doubling the cost of our trip, however, I opted to have her on my lap (possible until the age of two). Our time on the cancelled flight was a lesson in exactly how little space we would have for our belongings with just the one seat, and how organised I would need to be to make sure I had everything we needed when we needed it during the flight. So that night after returning home from the airport I did some judicious repacking.
All the baby girl’s food and milk went into one tote bag, all the other essentials – toys, books, headphones, phone, nappy change wallet, sleeping bag and pyjamas, jumpers for us both, toothbrush and toothpaste – went into another, and both these bags went into my backpack. After we’d boarded I was able to stow the food and essentials bags under the seat in front, leaving everything else – items that I thought might come in handy but wouldn’t definitely need (spare clothes, Calpol, etc) – in the overhead locker to save space.
Doing it this way, I discovered, means you can keep to a minimum the number of times you get up to take things out of the overhead locker – useful when travelling alone with a toddler, absolutely essential when travelling alone with a babe-in-arms.
Avoiding meltdowns
Plugging and unplugging my phone charger kept the baby girl occupied for a surprisingly long time
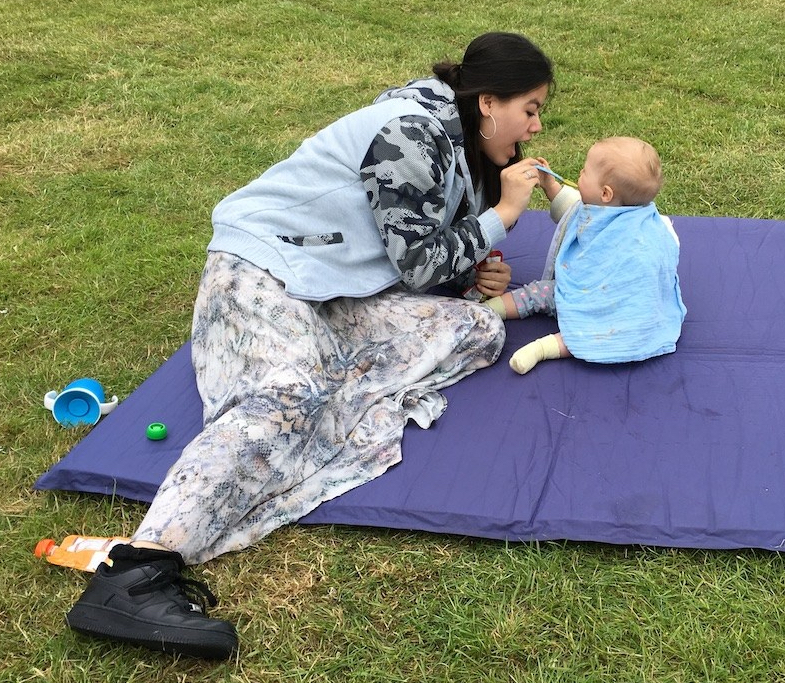
The baby girl was overdue for a nap when we boarded the (soon to be) cancelled flight. I had brought toys, books, a phone full of downloaded episodes of Hey Duggee and Sarah & Duck, and plenty of food, yet for some reason (probably because I was tired and hot too), I was inept at putting these distractions to good use, and the girl just got grumpier. I made it worse by attempting to get her to nap in the sling, something she was clearly not going to do just to suit me.
On the flight the following day things went more smoothly. I dressed her in cooler clothes so she wasn’t so affected by the heat, and it helped that the seat next to us was empty so we had some space to spread out.
The baby girl was just as tired as she had been the day before, but I was quicker to whip out the snacks and cycle through the available distractions at the slightest sign of an impending meltdown. In terms of my own sanity, I made good use of my wireless bone-conducting headphones, listening to podcasts while playing with the baby girl. I don’t do this at home, preferring not to divide my attention, but desperate times call for desperate measures.
In the queue for immigration at LAX
Instead of trying to get the baby girl to nap at her usual naptime, I threw the schedule out the window and waited until they dimmed the cabin lights. After putting her in her sleeping bag and reading her a story, she was happy to go to sleep. It only lasted an hour, but she was chilled enough to lie there awake and quiet for another hour after that.
I tried to put the baby girl down again for another sleep later and she just wasn’t going for it, so I gave up immediately and we spent the second half the flight walking up and down the plane in the dark, carrying bits of rubbish to throw away in the bin in the galley. It was quite tedious for me, but the baby girl enjoyed herself and a lot of the other passengers seemed to find it entertaining.
Fingers crossed we can repeat that positive experience on the flight back to London next week. Please, please, please let it not be cancelled….
I didn’t ever picture camping with a baby in my future. I’ve never really considered myself much of a camper – my parents didn’t take me camping as a child and the one trip I did with school was awful – yet in 2010 my partner and I decided that an 1980s VW campervan would be a much better investment than a boring old hatchback. Since then we’ve been all over the UK in it (and the newer one we bought when the first one got too unreliable), as well as to France, Sweden and Norway, squeezing in camping trips when we can alongside my work trips, touring with my partner’s band, and myriad friends’ weddings.
We’ve taken the baby girl camping in the van several times now and here’s what we’ve learned so far,* divided into 10 sections: tent or campervan; packing; choosing a campsite; choosing a pitch; setting up camp; sleeping; feeding; nappy changing and potties; bath time; and insects. I deal with the specifics of festival camping in another post, so do check that out if you’re planning on taking your little one to a musical festival.
Tent or campervan when camping with a baby
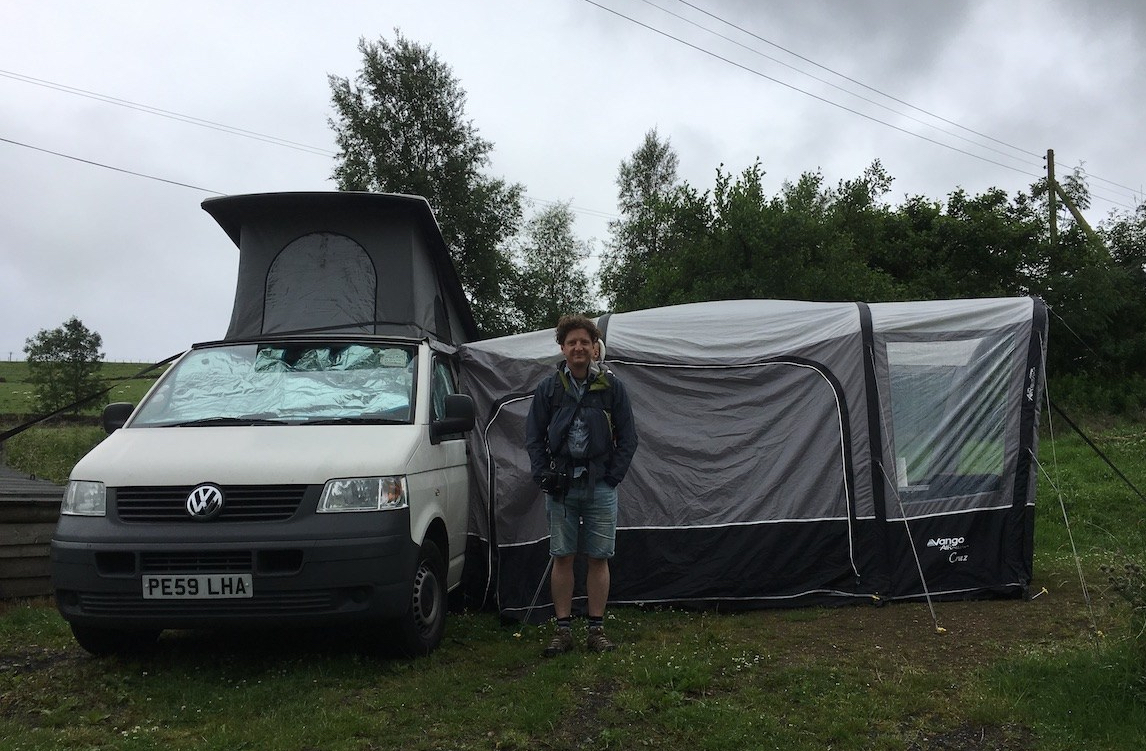
At a tiny campsite in Yorkshire in summer 2017, our van’s roof popped up ready for bed
Clearly I’m biased, but a campervan is definitely the way to go if your budget will stretch that far. I’d recommend owning one, but there are places to hire them all over the place if you’re not up for that sort of commitment or financial outlay.
The benefit of vans over tents is that they’re warmer, quieter to sleep in, more secure and you can bring more stuff with you. Many vans will also have a fridge, hob and sink – much easier than setting up a camping kitchen outside a tent and useful for storing baby food and milk. A drive-away awning, which is basically a large tent that you attach to the sliding-door side of the van, provides extra space, and is particularly handy as a self-contained play area once your little one is crawling. Inflatable awnings are more expensive but much faster and easier to erect and strike than traditional tents with poles.
The major downside of a campervan is that you have to pack everything up if you want to go off exploring in it, whereas with a tent you can just jump in the car and go, leaving your whole camping apparatus in situ. Tents are also much less expensive than campervans to buy or hire of course.
When it comes to choosing a tent (or indeed a campervan awning for that matter), get the largest you can afford: large tents are slightly more time-consuming and complicated to erect than small ones, but not exponentially so, and if you’re stuck inside with a baby or toddler on a rainy day, you’ll want as much space as you can get. Essential elements are a covered porch area (ideally with a ground sheet) so you’ve got somewhere to cook and eat without getting food smells in your tent, as well as a place to store your pushchair and muddy shoes. An internal room is useful so you can sleep separately from your child. As with awnings, an inflatable tent will save you a lot of time.
Don’t bother with suitcases and pillows. Designate a different colour pillowcase for each family member and use them to pack clothes into instead. Then cram all your pillow-suitcases into a black bin bag so they don’t get grubby in transit or when setting up camp. Half way through the trip you’ll need to consolidate clean clothes into one pillowcase and dirty clothes into another.
Pack far more clothes than you think you’ll need. Camping with a baby can be a messy business.
Choosing a campsite for camping with a baby
Tastes vary – I like my campsites relaxed, peaceful and in wild and beautiful locations, and am not too fussed about the state of the toilet facilities, while some people value a neatly maintained shower block and aren’t bothered by the immediate surroundings. The good news for new parents is that camping with a pre-crawling baby is much the same as camping child-free, so you can choose your campsite based on the same criteria you would have done in the past, whatever your priorities happen to be.
Once your baby is heading towards toddlerhood, facilities like a play area, beach or on-site petting zoo are a major boon. If you’re staying for any longer than a few days, laundry facilities come in very handy, allowing you to cut down on packing.
Choosing a pitch for camping with a baby
Again, tastes vary. We usually prefer to be as far from the toilet block as possible, as this tends to be the least busy area of a campsite, but there are benefits to being closer to the facilities once you’re camping as a family. Bear in mind that walking anywhere with a toddler takes a long time.
If your baby is sensitive to noise, somewhere without a lot of passing traffic will give you all a better chance of a good night’s sleep. And request a pitch away from the campsites internal roads once your toddler is on the move – many campsites have a car-free recreation area surrounded by plots. These tend to be noisier, with children playing first thing in the morning and then into the evening, but knowing your little one will be out of the way of traffic outweighs this slight inconvenience.
Setting up camp with a baby
My sister feeds the baby girl while my partner and I set up camp on a trip to Cornwall, our first as a family
If there are only two adults in your party, try to time your arrival for when your child is sleeping – unless you’ve opted for a small tent, pitching camp single-handed while your other half holds the baby is challenging. Other options are for one person to wear the baby in a sling as you pitch the tent together, or to set up a travel cot to serve as a play pen. Going camping with friends or family members offers the distinct advantage of there always being someone else around to hold the baby while you get things done, of course.
Sleeping on a camping trip with a baby
Dress your child in extra layers to minimise the chance of them waking up cold in the night. A 3.5 tog sleeping bag on top of a long-sleeved vest and all-in-one sleep suit or pyjamas will keep your baby toasty in temperatures as low as 14 degrees centigrade. If you don’t have a sleeping bag that thick, doubling up lighter weight ones will work just as well.
Bear in mind that if you’re camping in the summer in the UK it gets light early and dark late, not ideal for babies and toddlers who can only sleep in a blackout. travel cot cover. We put the girl in a pop-up tent travel cot within our awning or campervan and put a breathable blanket over the top, which does the same job, though less elegantly.
Noise is trickier to deal with but choosing a quiet pitch will help. White noise could come in handy too. The earlier you start travelling with your baby, of course, the more likely she’ll be to sleep through the sort of background noise you get at a campsite.
In campervans with a pop-top roof, the bed in the roof is a good place to put your baby if you don’t want her in your bed with you. The baby girl’s pop-up tent travel cot fits our roof area perfectly, and it means she’s in no danger of rolling out. When she outgrows the tent we’ll start using the safety net that came with our van (it was converted from a panel van by a guy who went camping a lot with his children) to keep her safe in the roof at night. We sleep in the rock ‘n’ roll bed (see picture below), leaving the awning free for any friends or family camping with us.
As already noted above, a large tent with an internal room will enable you to sleep separately from your child, and more importantly, it’ll give you the option to hang out comfortably inside after your baby has gone to bed and while she’s napping.
Feeding on a camping trip with a baby
Note the large number of travel pouches of baby food stowed away in the cupboard of our van
As far as I’m aware, there isn’t really a way of feeding your baby while camping that isn’t a bit of a faff. There are lots of options available, but none are without their drawbacks.
A foldable camping high chair is very lightweight and packs away small but the tray is so flimsy that your child will end up covered with food (even more so than they already do). Standard travel booster seats (we have this one) come with sturdier trays, but you’re unlikely to have a chair with you that you’ll be able to attach such a booster seat to safely. That means feeding your child with the booster seat either on the ground or on a table, neither of which is ideal. A lap belt will keep your baby on your lap but means you’re stuck in one place until she’s finished her meal – you’ll also end up covered in food, which is more of an issue that it would be at home because you probably won’t have access to a washing machine. On balance, we find the lesser of these evils is the inconvenience of feeding the baby girl on the ground, so we use a booster seat.
Jars and pouches of readymade baby food come in very handy while camping, since you probably won’t have the space, utensils or storage options available for making your own. Now that the baby girl eats most things we just plan our meals so they’ll appeal to her too, but when she was smaller we always made sure to have a packet of couscous with us on camping trips that we’d add to readymade baby food for extra texture and bulk. That and bits of cucumber, bread and yoghurt mostly formed her diet on those early trips.
For bottle-fed babies, cold water sterilising is your best bet. You’ll need sterilising tablets or liquid and a large plastic container with a lid. See this post for how to do it.
Nappy changing and potties when camping with a baby
We try to keep nappy changing to one area in the campervan or awning for the sake of convenience and hygiene but inevitably end up changing the baby girl here, there and everywhere. We just take her nappy change wallet and stow extra nappies, wipes and biodegradable nappy sacks (important in this context to keep odours to a minimum) in an easy-to-access place in the van for refilling when necessary.
I’m not usually a fan of one-use cleaning products, but antibacterial wipes are an important bit of kit when it comes to camping with a baby or toddler still in nappies. We keep bottles of hand sanitizer all over the place too, as with the best will in the world you’re not going to be washing your hands on a camping trip as frequently as you would be at home, and sanitising is better than nothing.
Don’t forget to pack a potty if your toddler is potty trained, as well as some biodegradable potty liners. Your child will most likely use these on camping trips long after she’s toilet trained – far preferable to a long walk to the toilet block in the middle of the night if she wakes up needing a wee.
Bath time when camping with a baby
Post-baby bedtime drink – note the inflatable paddling pool in the porch of the awning
Bath time is an important element of lots of babies’ bedtime routines but you’d be hard pressed to find a bathtub at most British campsites (props to Gwithian Farm Campsite in Cornwall, which has both a family shower room and a bathtub for babies). The solution is to pack a small inflatable paddling pool, which you can either use in the shower block or in the porch of your tent if the weather is warm enough. Option two is more labour-intensive as you’ll need to carry water from the nearest tap and heat it up on your camping stove, but it’s nicer being able to do nappy and pyjamas within the quiet and privacy of your own tent, rather than in a bright shower block.
Parents of toddlers who don’t require a bath to get into sleep mode but are grubby enough to need hosing down before bed can experiment with taking their little ones into the shower with them, though I’d only recommend it once your baby can confidently sit by herself. As with showering after swimming, this requires a bit of forward planning to make sure you can get your toddler dry and dressed before they get cold, while also getting dressed yourself. Since the baby girl has got the hang of standing up in the shower I’ve taken to leaving her in the shower while I get dressed (always read to leap to her rescue should anything untoward happen of course). Doing it this way means we both stay warm.
Insects when camping with a baby
Insects are more of an issue in some areas of the UK than others, so look into this before you decide on a campsite if you know your family is likely is be bothered by bugs. Wherever you go however, it’s a good idea to take child-friendly insect repellent with you, and to keep tent doors zipped up at all times, especially in the evening. We learnt this the hard way during a camping trip in the Yorkshire Dales in summer 2017, ending up with an awning full of midges and a million bites each – not fun.SaveSave
I try to pack light for adventures with the baby girl, but I rarely succeed. Which is where buggy clips come in. I keep the pram rain cover, a SnoozeShade and the sling in the basket under the pram, so everything else – from nappy changing stuff to spare clothes and from toys to snacks – has to go on the handle bar. You can buy changing bags designed to hang directly from the pram, but I’ve never found one I like the look of, so I tend to use a large shopper and buggy clips instead.
The clips come in handy in plenty of other situations too, for shopping, as a secure place to keep my handbag when I’m not wearing it, and for the baby girl’s lunch box when I’m feeding her in the buggy.
There are various styles available, but I like the ones that are essentially large climbing carabiners with a bit of foam covering the metal to stop them slipping along your pram handle or scratching the chassis. The other options, which attach to the pram with Velcro, feel less secure somehow. Depending on the model of your pram and how much you care about it getting scratched, the foam may not be all that useful – if that’s the case for you, search online for ‘large carabiners’ rather than ‘buggy clips’. The results will be less expensive than the ones made with parents in mind.
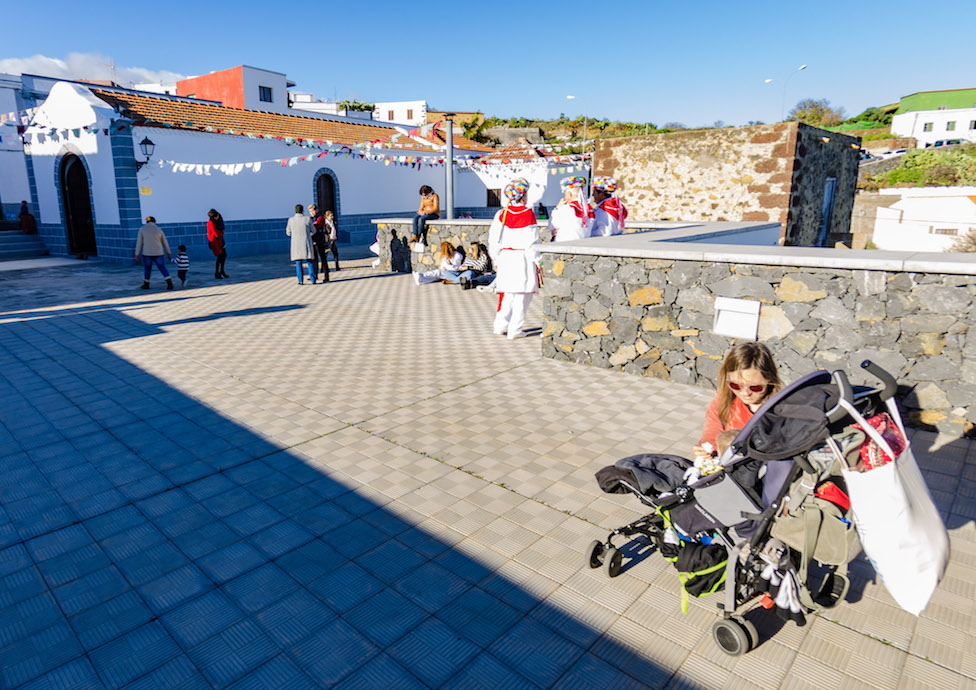
Out for the evening with an overloaded pushchair on our trip to the Canaries
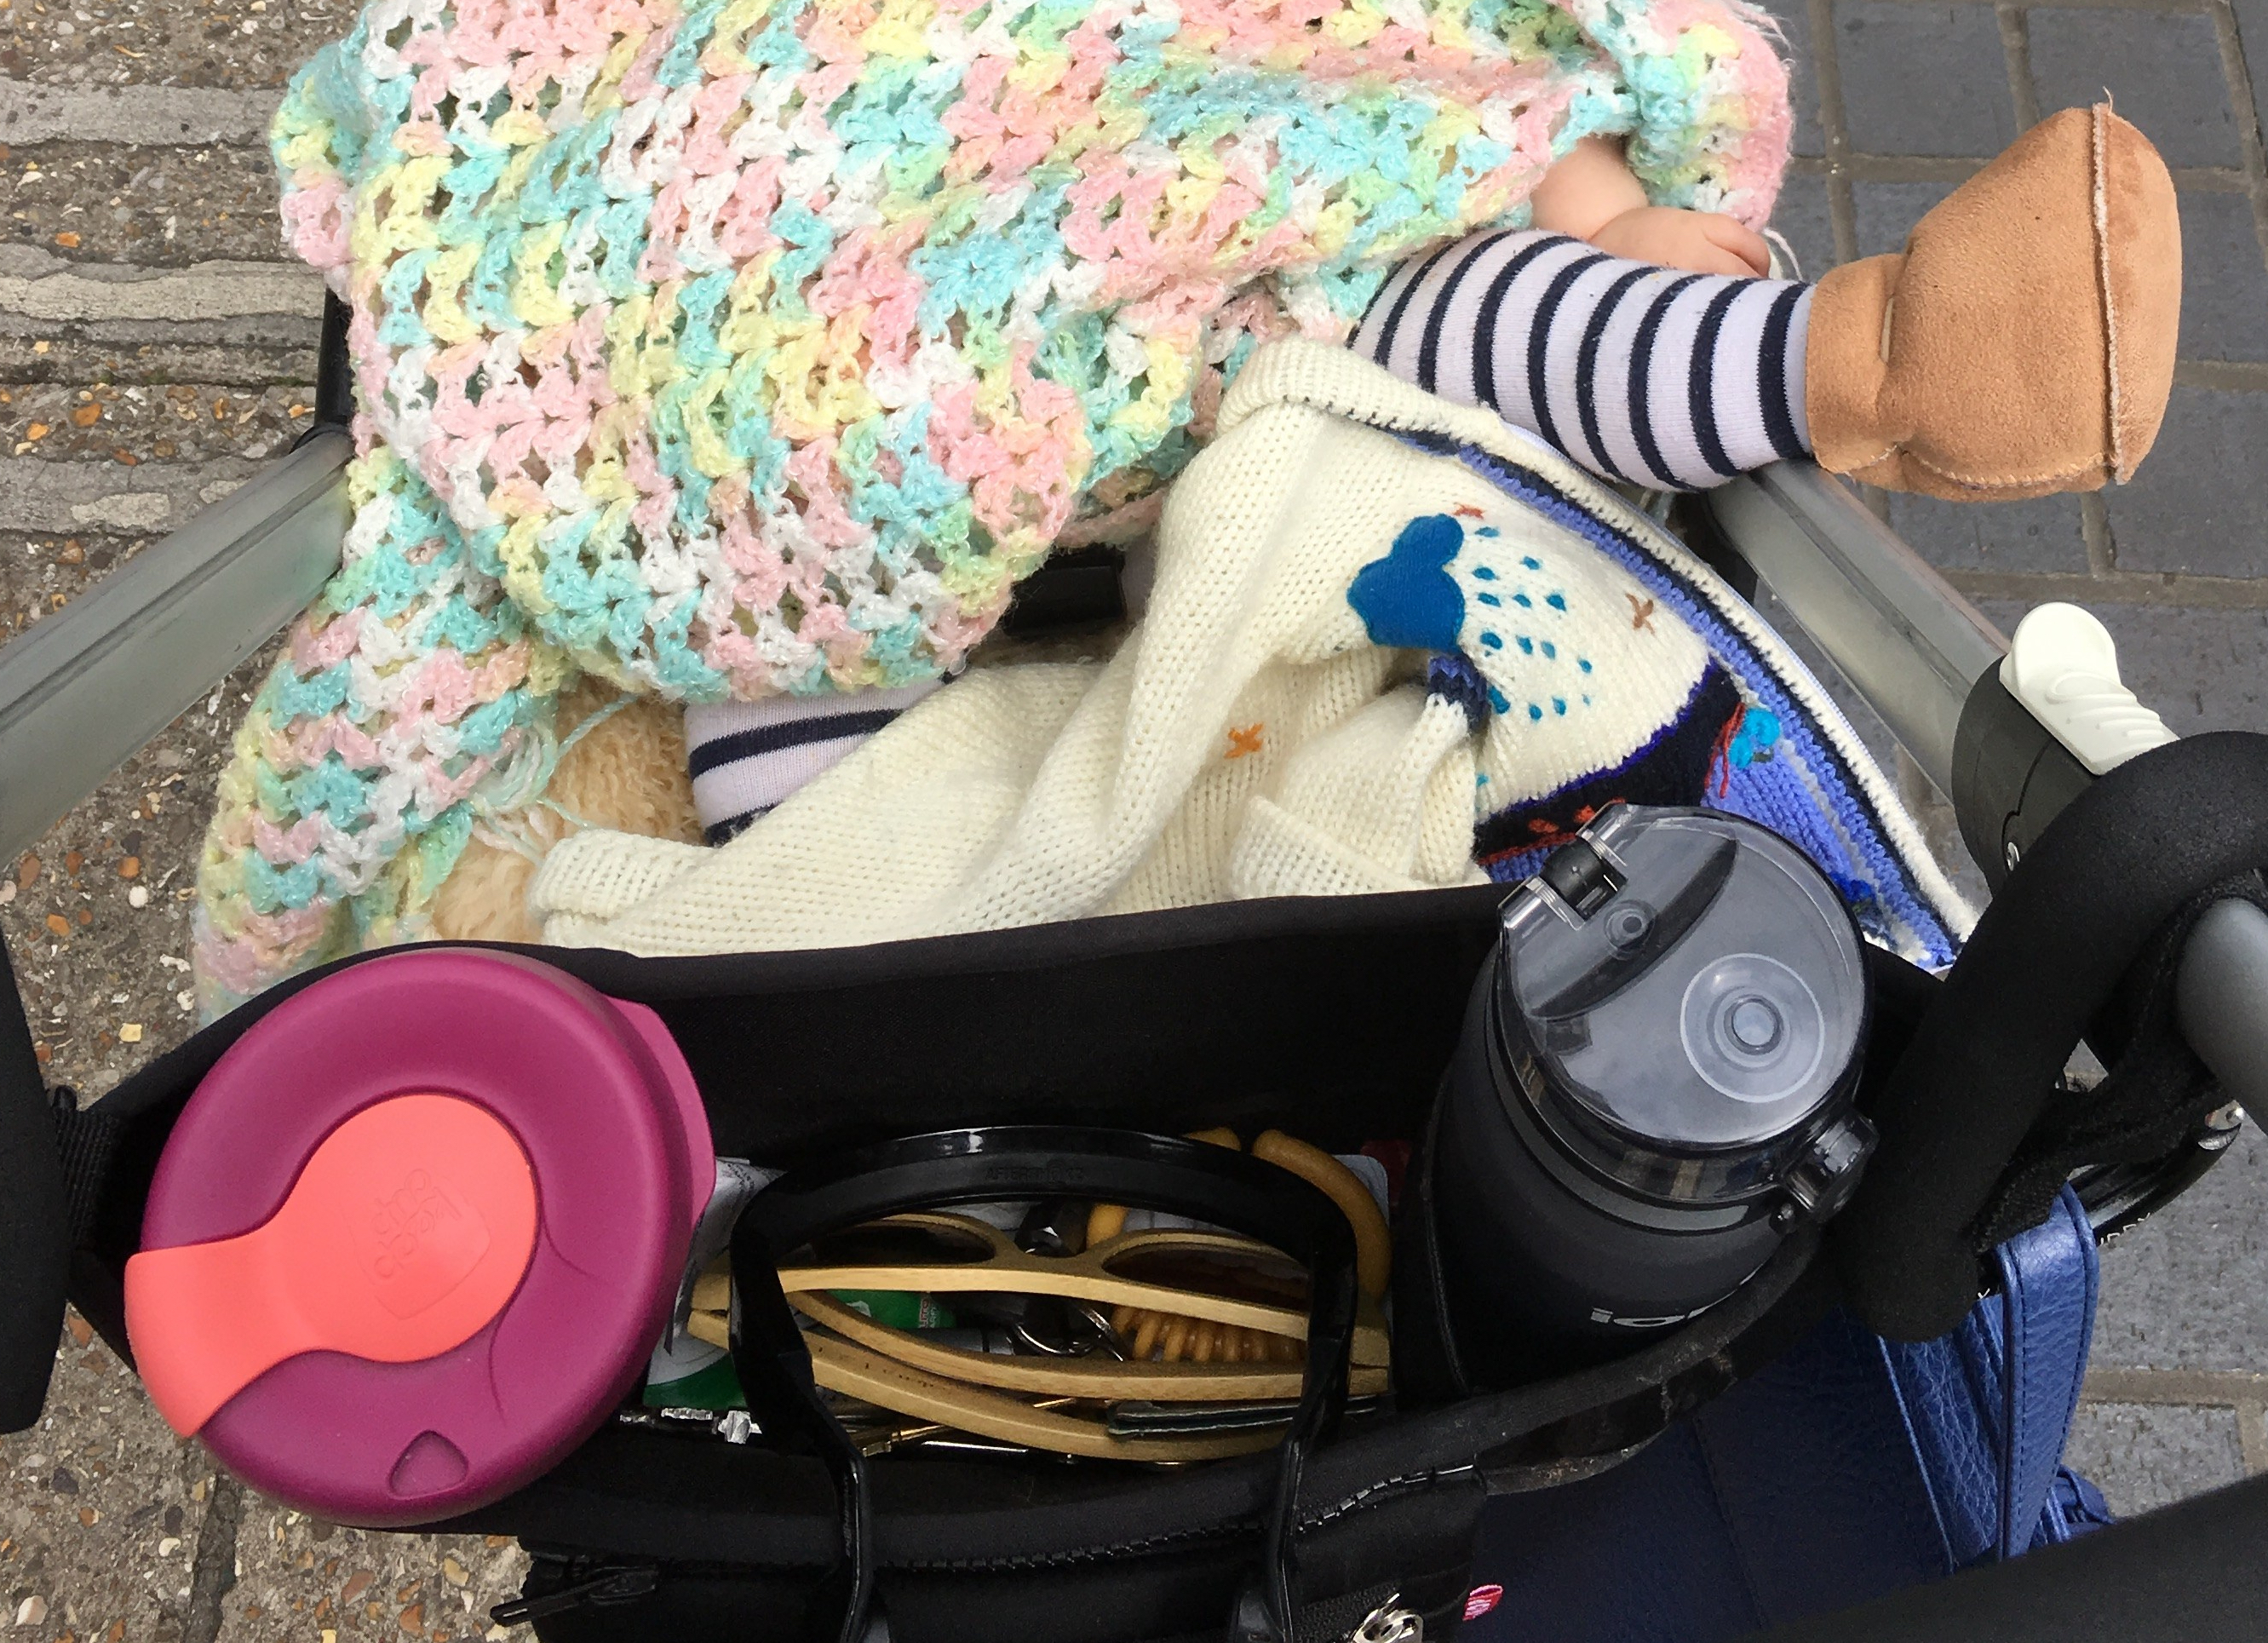
Buggy organiser: truly essential kit for baby adventuring, whether near or far.
It’s amazing how many things you can squeeze into a buggy organiser. Keys, mobile and travel pass for starters, but less obvious items too. If you spend a lot of time walking your sleeping baby around in her pushchair, headphones are an essential, whether for hand-free phone calls or sanity-restoring podcasts. Lip balm is good to have in cold weather and a pack of tissues is invaluable. If it’s bright enough outside for sunglasses, they need to go somewhere when you’re not wearing them – your buggy organiser is a much better place than on top of your head. Cash machines are never where you need to them to be, so a spare tenner is a must.
When the baby girl was very small and I was still in that phase of breastfeeding where you’re parched and ravenous all the time, I kept the buggy organiser stocked up with snacks and drinks. Now that she’s bigger, it’s still packed with snacks, but they’re for her, not me, and my keep cup has been supplanted by her sippy cup.
You’ll usually find an emergency toy car in there somewhere, and room is always made for a bottle of Calpol when the baby girl is teething. In goes her hat every time she decides she’s taking it off, thank you very much, ditto her shoes and socks. The buggy organiser is where we stow the baby girl’s ear defenders between gigs at festivals, and it’s a handy place to keep passports and boarding passes at the airport too.
There are lots of different styles to choose from, but I love the Grab & Go Stroller Organizer from Skip Hop. Insulating material keeps your cold drinks cold and your hot drinks hot, it’s spacious, and it comes with a detachable purse so you can leave your pushchair somewhere and easily take your valuables with you. Particularly in the early days, I don’t know what I would have done without it.
On the train on our way home from the baby girl’s first trip abroad, to Santiago de Compostela in Spain, when she was six-weeks-old.
Public transport used to be my go-to method for getting to and from the airport but that’s all changed since the arrival of the baby girl. Unless our trip is a super short one, these days we travel with too much stuff to mess around with trains and buses for airport transfers.
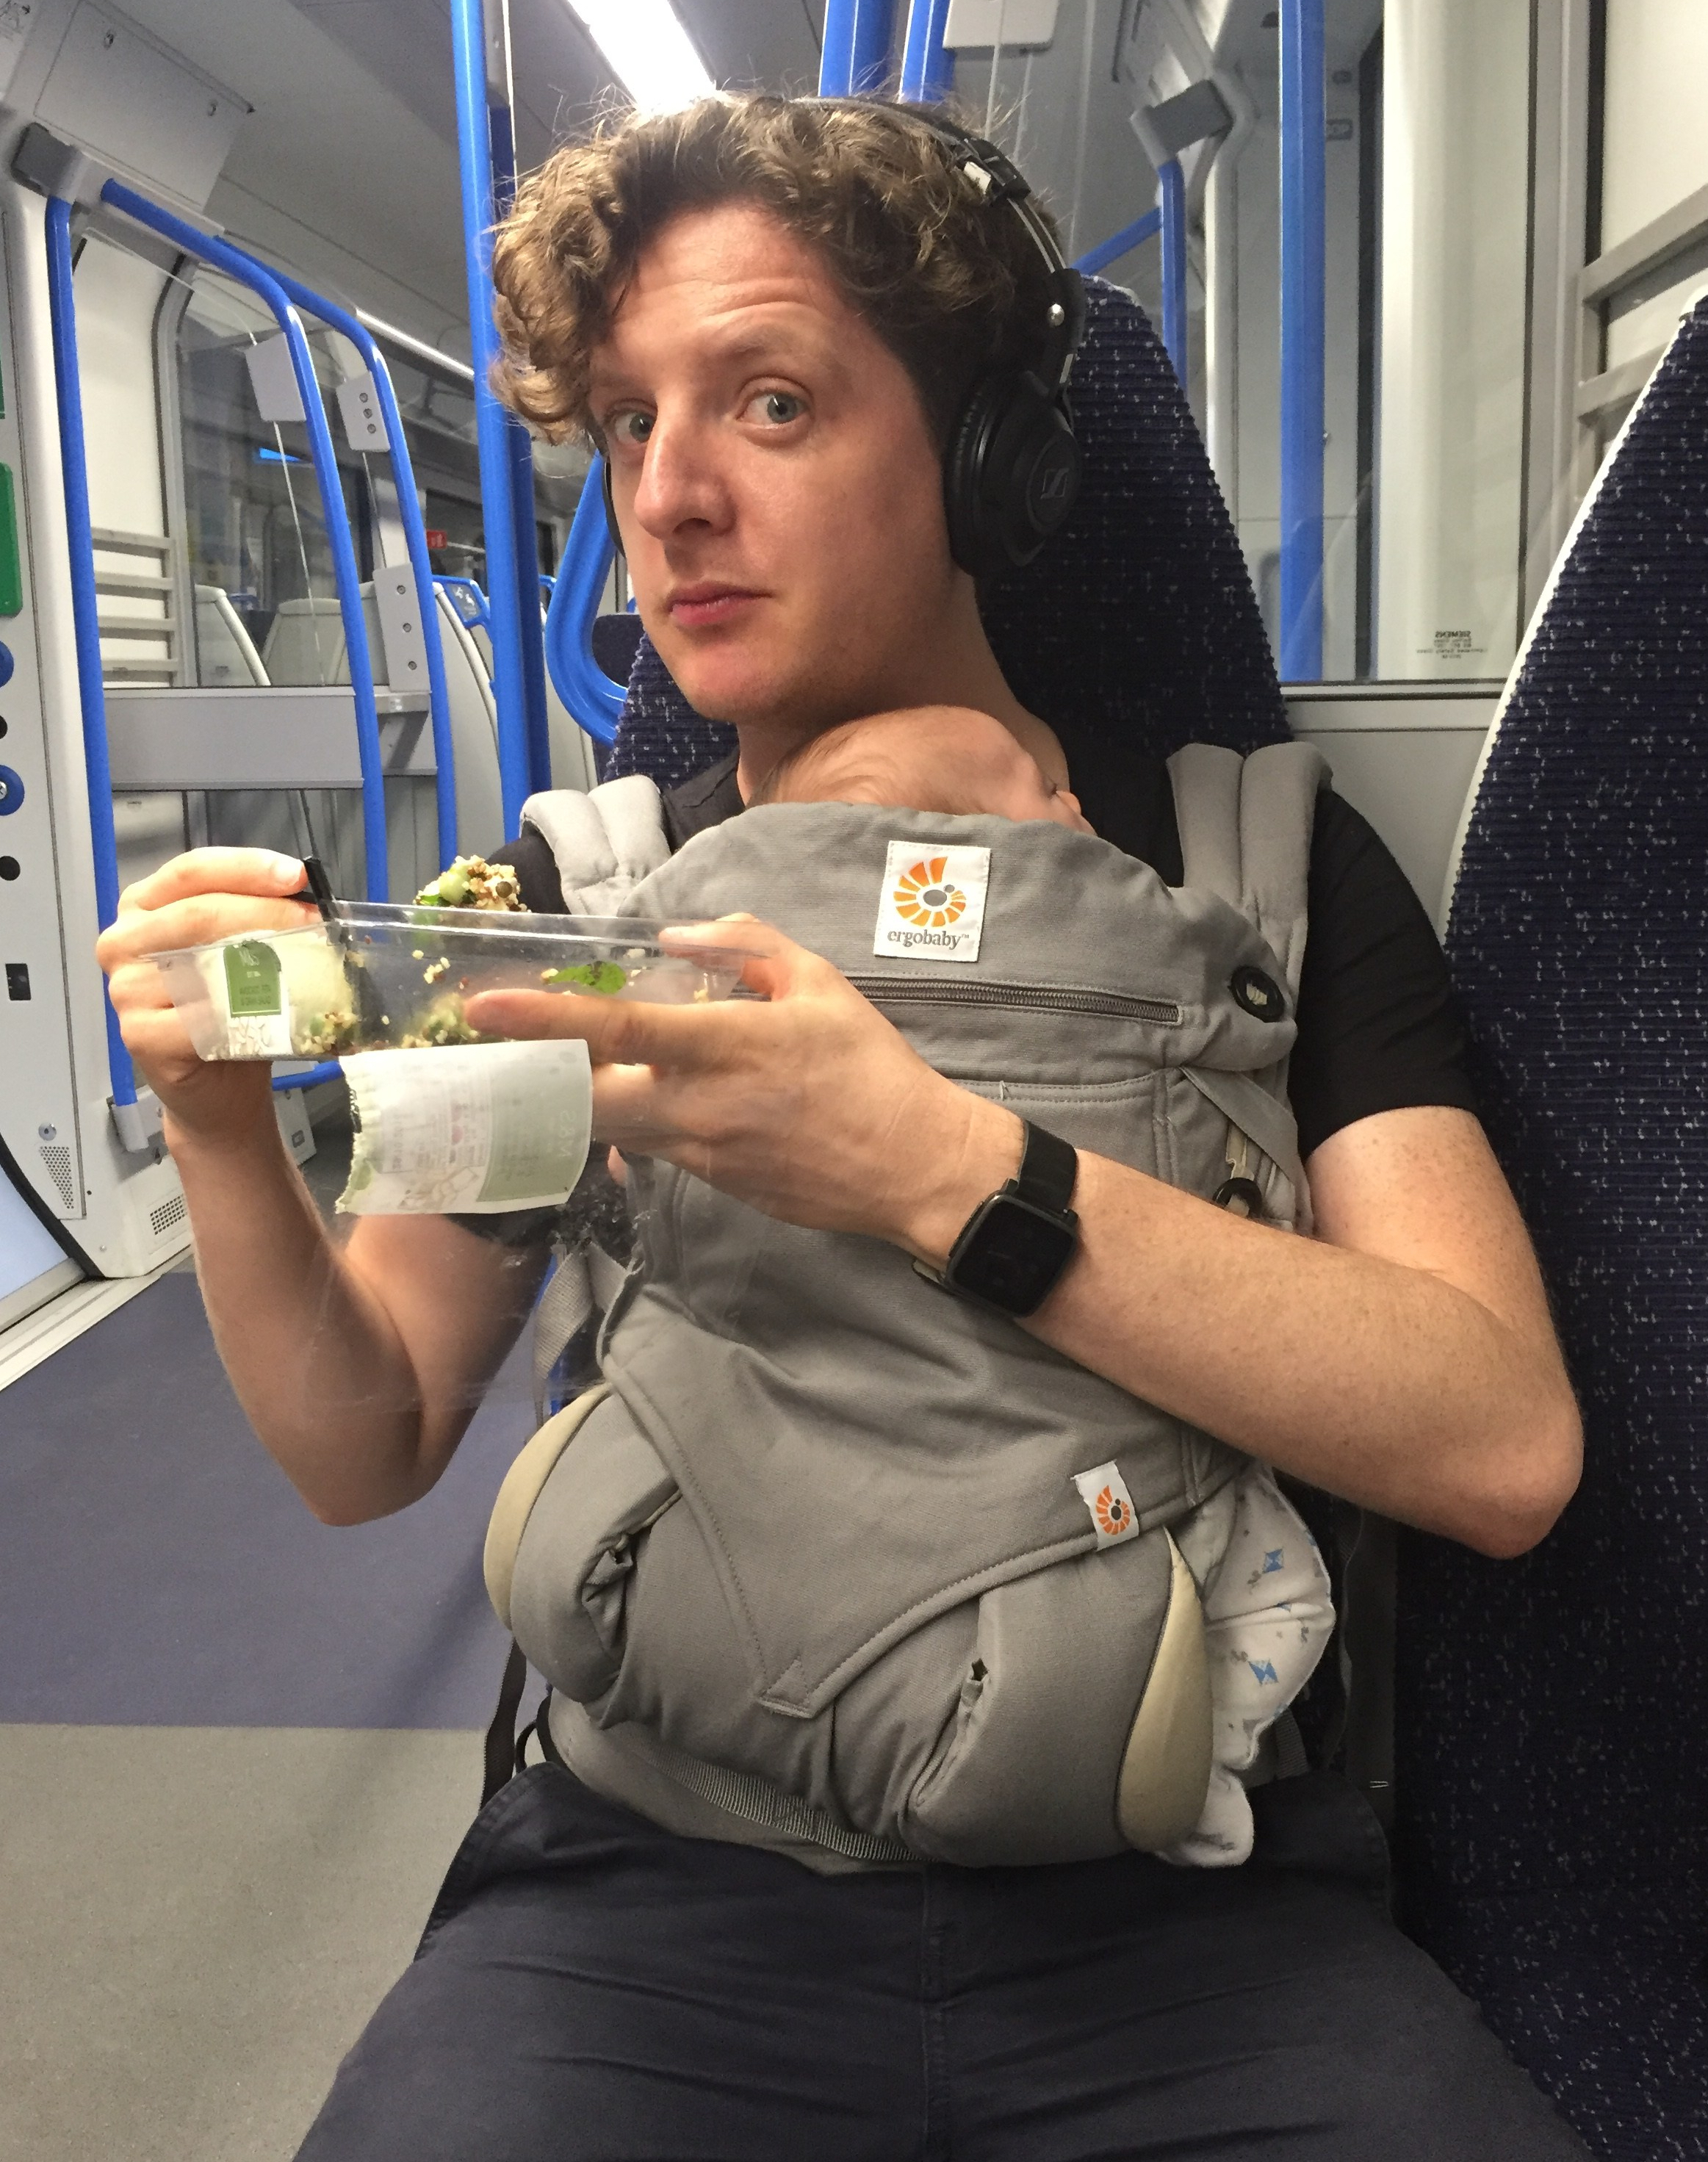
On the couple of occasions that we used public transport for transfers when the baby girl was still very little, we carried her in her sling, having packed the pushchair away before leaving the house, ready to be checked in with the rest of the luggage. Doing so meant there was one fewer thing to manoeuvre on and off trains and up and down escalators.
Now that she’s too big for the sling but not big enough to go without a pushchair, we make sure that we’ve packed in such a way that we’re able to manage both suitcases and pushchair. (When it comes to the practicalities of these journeys with pushchairs, my posts on train travel and navigating public transport might come in handy.)
Taxis are the easiest option, but can be very expensive once you’ve factored in a car big enough for all your luggage and your baby’s car seat. More often than not, therefore, we drive our van and leave it in a car park near the airport, then take a shuttle bus to the terminal. If you’re willing to pay a little more, but still less than forking out for cabs, there’s always onsite parking, or valet services where your car is parked for you – usually available for car parks both on and off site.
When it comes to getting to your final destination from the airport, I highly recommend booking a transfer in advance, particularly if you’re arriving late at night, don’t speak the language or are visiting for the first time. You can request a car seat when you book your transfer, but there’s no guarantee that you’ll get one, so it’s usually safer to bring your own. (Most airlines won’t charge you for checking in a child car seat, but do check before you book.) It’s worth checking the laws around child car seats in your destination before you travel though, to ensure that your car seat meets the requirements. Here’s a very helpful list of the rules in different popular holiday destinations from the consumer group Which?
If you can’t bring your own car seat and end up having to take your baby in a taxi or private car without one, make sure you have a sling with you. The adult who will be carrying the baby sits in the back seat, straps himself in and then puts on the sling so the baby is held by the sling and not the seat belt. To be clear, I’m not advocating that you do this: it’s a safer option than having your baby loose on your lap or strapping her in with your seat belt, but it’s not a safe way to travel.
Hiring a car can be a very convenient way of doing things, if it suits the rest of your holiday plans. Car seats can be an issue here too, with some parents reporting having booked a car seat but finding none available on arrival. This doesn’t happen very often, but again, you can avoid worrying about it by bringing your own.
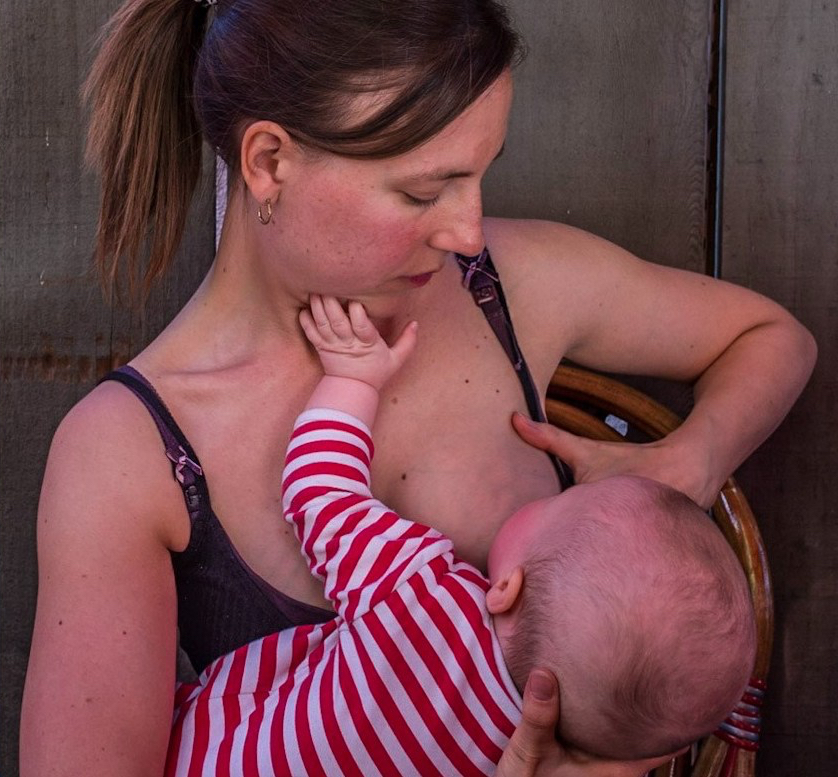
I’ve recently stopped breastfeeding the baby girl, having successfully nursed her out and about all over the place over the last year and a bit, including to the US and Egypt. I never experienced the slightest bit of hassle, finding that my go-to breastfeeding clothing solution – strappy top under a T-shirt – did the trick pretty much everywhere. In cold places I added a couple of layers on top, finding that thinner fabrics were more convenient than bulky ones that bunch up when you lift them to get your baby to your boob. Swimwear-wise, I found triangle bikinis most convenient for breastfeeding on the beach (top tip: remember to give your nipples a once over with a wipe – as chemical-free as possible – before feeding your baby straight after a dip in the sea).
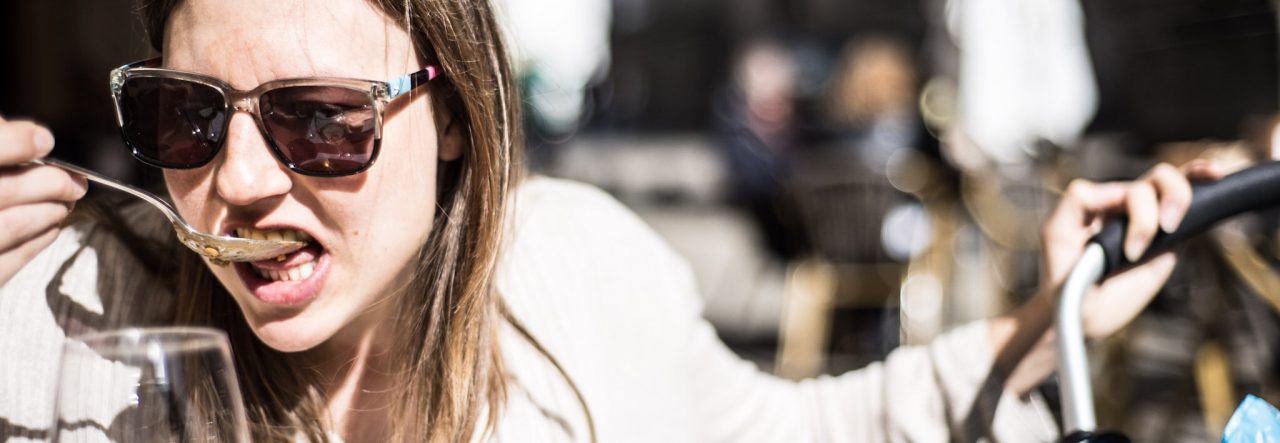
In hot places where wearing two layers was too much, I opted for lightweight dresses with buttons down the front. At least that was the idea. Sometimes, however, I found myself feeding the baby girl in just a strappy top, and basically revealing an entire boob to the world, as in the photo below. I didn’t plan to expose myself that day, but I was so warm I just couldn’t bear to keep my second layer on. Fortunately, no one in the restaurant batted an eyelid, and it was only when I saw the photo that I realised quite how naked I had been. I paused over whether to include the picture here, but decided to post it because I think it’s helpful to have positive, unambiguous images of breastfeeding out there in the world.
Though breastfeeding in public is welcomed in most places, there are corners of the globe that aren’t too keen, so if you’re a breastfeeding mother it’s worth checking before you travel to set your mind at ease/arm yourself with some facts about your rights in case anyone confronts you. Wikipedia has a handy list of attitudes to breastfeeding in public around the world, which is a good start. Googling “attitudes to breastfeeding [your destination]” should bring up various resources and forums too. If you’re still nervous, consider packing a breastfeeding cover. I never used one so I can’t recommend one personally, but this handy roundup from Made for Mums should give you an idea what’s available.
When it comes to feeding your baby on the move, department stores and airports often have parents’ rooms for just that purpose. Posh hotels can be a good option too – though not all of them, as Claridge’s made abundantly clear a couple of years ago.
Wherever you find yourself, if privacy is a factor for you when feeding, opt for a table by the wall and sit with your back to the room. As far as your physical comfort is concerned, look for a chair with a back. I never got the knack of breastfeeding the baby girl in the sling, but would have loved to do it – friends who’ve mastered this skill find it both convenient and discreet.
Other things to take with you: nursing bras, obviously, but pack more than you think you’ll need. Between the stresses of travel, the time difference and a change in climate, it’s likely that your baby will be feeding more frequently than usual, which means that your breasts might become engorged and leaky. Bring a small bottle of travel wash (you can use shampoo, but it won’t be as effective) and a mini folding clothes airer so you can wash and dry milky bras overnight. You’ll want to bring a bigger supply of nursing pads and muslin squares than usual for the same reason.
If you’re planning to express while you’re away, take a manual breast pump rather than an electric one – they’re much lighter and you don’t run the risk of running out of batteries or forgetting the power cable. Remember that any expressing or feeding equipment that comes into contact with milk needs to be sterilised until your baby is a year old (according to the NHS) – you can read my post on the various options for sterilising while away from home here.
Finally, a wide-brimmed hat will provide shade for both you and your baby when nursing in hot destinations if none other is available. If you, like me, are the type of woman who has always wanted to wear such a hat but never had the nerve before, now is very much your moment.
Travelling a lot for work, I prefer to spend as little time packing – or thinking about packing – as possible. Nerdy though it may sound, I never start the process without consulting one of several packing lists – city break, hot climate, cold climate, hiking, scuba diving, etc. And now, this baby packing list too.
The baby girl was four-weeks-old the first time we went away with her, to a cottage in Wales to celebrate my mother-in-law’s 70th birthday over a long weekend. For the first time in a long time, I didn’t have a packing list for the task at hand. After a chaotic day and night throwing baby stuff into various receptacles almost at random, we managed to hit the road. My partner driving, I immediately set about writing a list.
Here it is, more tidily laid out than in the original version on my phone, and with a few annotations. I hope you find it useful. If there’s anything I’ve missed, please add your own packing essentials in the comments (I’ll be doing a separate post on travelling in hot climates – if you want advice about what to pack for a hot climate trip in the meantime, drop me a line in the comments below).
Baby monitor Or a spare phone or tablet if you’re using the Baby Monitor 3G app (for more information on why this is a brilliant thing, here’s my recent ‘essential kit’ post about it).
Muslin squares For swaddling, cleaning up, and as comforters.
Nappies 8-12 nappies per 24 hours away, depending how much your baby is pooing in the days leading up to your departure. You can almost always buy nappies where you’re staying, but if you’re travelling with a very small baby, or are going somewhere remote, better to be safe than sorry and take enough from home to last you for the whole trip.
Nappy wallet and change mat Including nappy sacks, nappy rash cream and hand sanitiser.
Night light
Pram/pushchair Sunshade for napping, plus a bag of some kind to pack the pushchair into if you’re flying. We have the official travel bag (bought on eBay) for our Bugaboo Bee (also eBay), which is excellent because it protects the pushchair from being chucked around by baggage handlers and also gives you extra space to stow baby stuff. If you don’t want to buy the official version for your pushchair, there are generics available. But go for one with wheels and/or backpack straps if possible. In a pinch you can use a heavy duty bin liner for each bit of the pushchair (and remember to pack extras for the return journey).
Travel cot/tent/bassinet Having been on a couple of trips now where the cot provided hasn’t been fit for purpose, I highly recommend bringing one of your own.
Wipes One pack of wipes per 72 hours away. Though you can buy baby wipes when you arrive, the options might be pretty rubbish – very highly scented, for example, or not suitable for sensitive skin – so if you’re fussy about these things, just bring a couple of extra packets from home.
Laundry detergent A small quantity for hand washing milk-soaked bras (and nursing pads, if you use washables).
Nursing bras Including a couple comfortable enough to sleep in if you’re still at the stage of needing to wear a bra and nursing pads to bed.
Nursing pads Take more than you think you might need in case the disruption of travel makes your baby feed more frequently, thereby causing your breasts to leak more than usual.
*If bottlefeeding (whether formula, expressed breastmilk or a combination of the two)*
Baby food in jars or pouches for emergencies Plus any type of food you really couldn’t live without while you’re away. The baby girl is a bit of a fussy eater at the moment, but will always polish off a big bowl of porridge for breakfast, so we take a small Tupperware container of oats away with us if we’re self-catering just in case we can’t find any locally at our destination.
Baby/toddler spoons
Bibs/smocks
Laundry detergent A small quantity for washing bibs so you don’t have to pack one for every meal.
The NHS recommends sterilising any feeding or expressing equipment that comes into contact with milk until your baby is a year old. So if you do any bottle feeding at all and are planning on spending time away from home with your baby before she turns one, you need a portable way of sterilising her things. Even with the most generous baggage allowance in the world you’re not going to want to take your bulky plug-in electric steriliser on holiday.
If you’re staying somewhere with a kitchen, boiling the feeding equipment in a saucepan on the stove is a good solution that doesn’t require any extra kit. Make sure there’s enough water to cover the equipment, check that there are no air bubbles trapped, and boil for five minutes. If you put the bottles together with their teats and lids and keep them in a clean container, they’ll stay sterile for up to 24 hours.
An easier route, which doesn’t require access to a stove, is cold water, or chemical, sterilising. There are two options available – tablets and fluid – and which one is best for you will depend on the circumstances of your trip.
They work in the same way: you make a solution and submerge your clean feeding equipment, again ensuring there are no air bubbles. The equipment is ready to use after the time specified on the label (15-30 minutes usually); there’s no need to rinse it, just shake off the excess solution. The items will stay sterile if left in the solution for up to 24 hours; after that point you have to make a fresh batch.
The tablets are extremely light and take up no space in your luggage but are less convenient to use. Each tablet is designed to be dissolved in a specific quantity of water (which varies brand to brand) so if you don’t have a container large enough you’ll need to do some sums and split the tablets accordingly. The fluid is heavier in your luggage but it’s easier to measure out the exact quantity you need.
Whether you opt for fluid or tablets, pack a Tupperware box big enough for your requirements, measuring how much it holds before you travel (pack a lid too – the solution can bleach fabrics so you don’t want it splashing around). You’ll also need a bottle brush and washing up liquid to clean the feeding equipment before you sterilise it, though I’ve been known to use shower gel for the purpose.
Even if you’re not planning on doing any bottle feeding at all, it’s a sensible precaution to take feeding equipment and a couple of bottles of ready-mixed formula away with you if you’re travelling with an unweaned baby, particularly somewhere remote. In the unlikely event that something happens to get in the way of breastfeeding, you’ll want an alternative way of getting some milk down her.
I’m not looking forward to the day the baby girl outgrows her pop-up tent travel cot. We bought it for a trip to Goa when she was four-months-old, and have used it every time we’ve gone away since then, at hotels, B&Bs, in our campervan, at festivals, when staying with friends and relatives, and for nearly a month when working in Edinburgh in summer 2017.
The benefits of a pop-up tent travel cot
The pop-up tent travel cot fits neatly into small spaces
It’s handy for a lot of reasons, primarily that it functions almost like a separate space within the room because it’s entirely enclosed once it’s zipped up. It’s not soundproof, and it doesn’t entirely block out the light, but it’s better than an open cot in both respects. (If it’s not dark enough in the room, we might drape a breathable blanket over the top). The zip itself is important too: zipping the tent closed works as a sleep cue – for our baby at least (except when it doesn’t, of course). And once it’s closed, it’s a barrier to mosquitos and other insects.
Given how different sleeping in the tent is from sleeping in a cot, you’ll want to do a few practice runs before you go away. It took the baby girl two naps in the tent in our living room at home to get used to it when she was three months old.
Daytime uses for a pop-up tent travel cot
Depending on your destination and type of trip, you might find the tent useful in the daytime too; and for more than just napping. We put the baby girl in it all the time in Goa so she could roll around with her teething rings and toys in a relatively clean environment. We must have looked ridiculous carting it to and from our room all the time, but the staff took it in their stride. We thought we’d have the tent on the beach a lot, as it provides UV protection, but ultimately it was too hot to do that, so we stayed in the beachside restaurant most of the time and took turns going for dips in the sea.
We’ve used it camping too, as a way of safely stowing away the baby girl for the moments when two sets of hands are required to set up or strike camp. Further perks are that it packs down very small and is very light. It’s so small and so light in fact that you can take the tent as carry-on on a plane or pack it into your luggage. Cunningly concealing the tent like this, you can pass off another small bag as a travel cot, thereby making the most of your infant baggage allowance of (usually) travel cot, pushchair and car seat.
The downsides of the pop-up tent travel cot
A major downside of the tent is that it doesn’t provide complete shade, so you can’t rely on it in sunny places – you’ll still need sunscreen and a sun hat. It gets pretty warm in there too – in Goa we used a little battery-operated fan and covered the baby girl with damp muslins to keep her cool.
It’s very easy to pop up and pack away, but the fact that you have to be either on the floor or in a very deep bend to get your child in and out means that it won’t be ideal for all parents/carers. We use the more conventional BabyBjörn Travel Cot Easy Go when we take the baby girl to stay at her grandparents’ house.
The baby girl in her pop-up tent travel cot on the beach in Goa, her miniature fan keeping her cool.
For most of the babies and toddlers in my life, bath time is an important part of the bed time routine. But what if you’re away from home, and the hotel or holiday rental property where you’re staying doesn’t have a bath tub? Here’s where an inflatable baby paddling pool comes in.
Hosing her off in the shower will get your little one clean, but if she’s not used to it you risk stressing her out with a new experience just at the time of the evening you want her winding down. It’s also a job that really requires two sets of hands until your little one is able to sit up confidently by herself.
You could forgo the bath altogether, of course, and use baby wipes instead, but that’s only really a solution for a short trip. Especially if you’re somewhere hot, and dealing with additional grubbiness-inducing elements like sweat, sunscreen, insect repellent, sand, chlorinated water, etc, you’ll definitely want to find a way to give your baby a proper wash at the end of the day.
The trick is to travel with an inflatable baby paddling pool, which you position on the floor of the shower, or just on the bathroom floor if the cubicle is too small or awkwardly located. If you don’t have hot running water, as was the case at the place we stayed in Goa when the baby girl was four months old, you can ask the management for a jug of hot water and blend until the temperature of the water in the baby paddling pool is what it should be.
A baby paddling pool is also handy for camping, allowing you to do bath time in the warmth and comfort of your tent or camper van, rather than interrupt the bedtime routine with a chilly walk back from the shower block.
Even if there is a bath tub where you’re staying, a baby paddling pool is a very handy piece of kit for hot climates, and beach destinations in particular. Unless you’re somewhere tropical, the sea will probably be too cold and rough for more than a quick splash. Hotel swimming pools, meanwhile, are often unheated and too chilly for all but the hardiest of babies and toddlers. A baby paddling pool, however, left in the sunshine to warm up a bit, is the perfect option for cooling off and splashing about in.


 I try to pack light for adventures with the baby girl, but I rarely succeed. Which is where buggy clips come in. I keep the pram rain cover, a